
February 4, 2020
Replacing the Fan on Your Device

It's common for computer fans to collect dust over time, and without proper cooling, your device may overheat and suffer permanent internal damage. In this TD Guide, we’re going to show you how to replace the fan of your Chromebook.
Before you begin, double-check that the device is powered down and unplugged from any outlets to avoid electrocution.
Step 1:
Turn the device over so that the bottom is facing up. Remove all 8mm screws on the back housing using a Phillips screwdriver. Once all seven screws are removed, you can then pry the panel off using your fingers or a plastic opening tool.
Step 2:
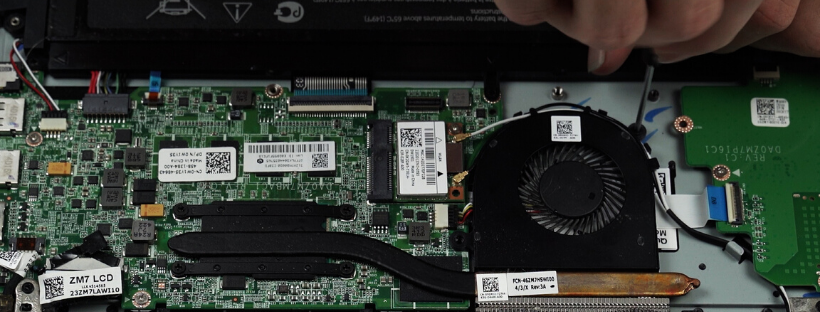
Remove the screws holding the fan in place, and then locate the two wires that connect the fan to the device and gently pull them away from the fan.
Step 3:
After loosening the fan, locate and gently disconnect the 5-pin port that connects the fan to the device. It's important to note that the 5-pin port is delicate, so avoid bending or twisting it as it may cause permanent damage. Once the fan is completely removed, follow the steps in reverse to install the new fan.
Learn more about our Repair Process here: https://www.techdefenders.com/repair/